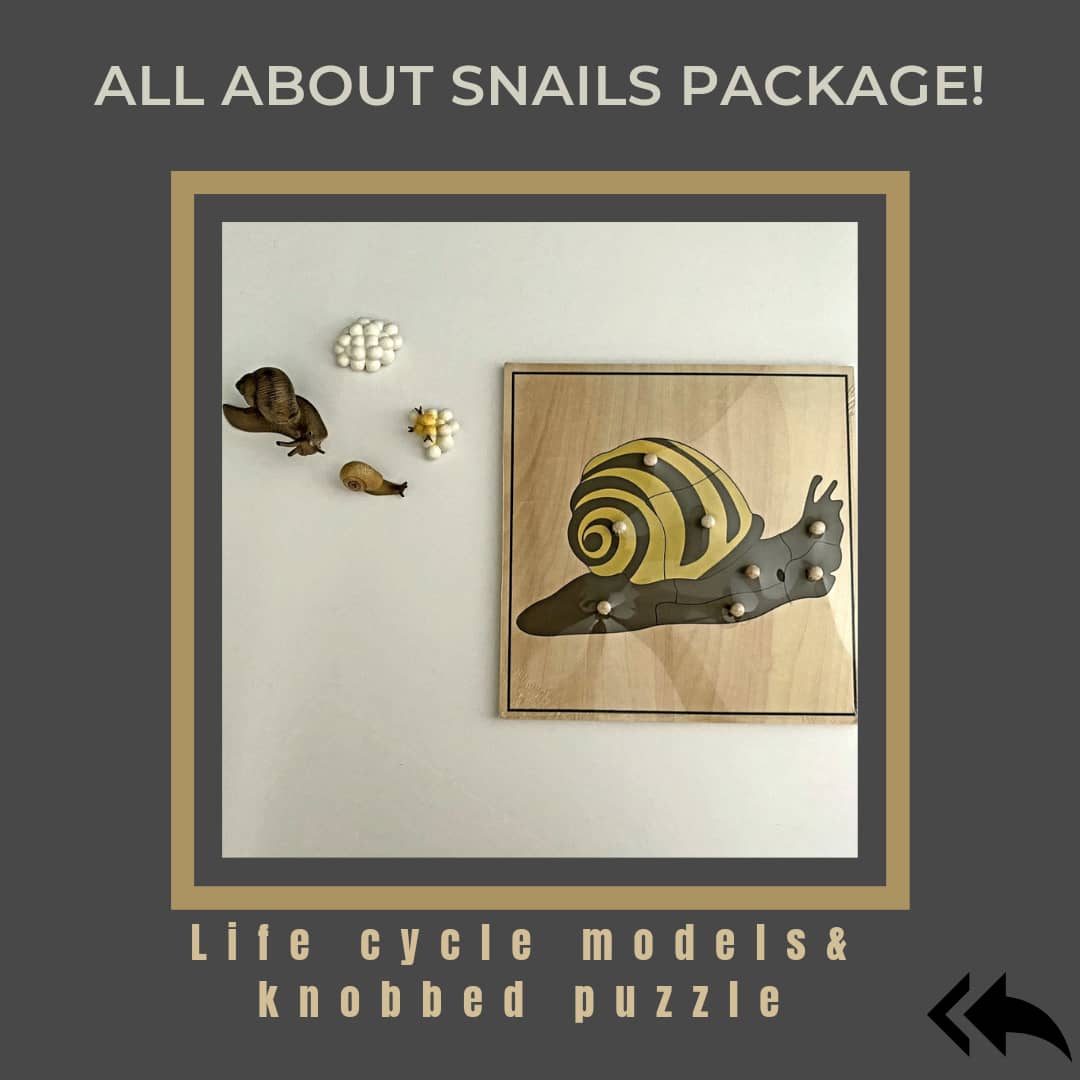

All about SNAIL Package - Life cycle Models /Knobbed puzzle
$15.90 SGD $17.90 SGD

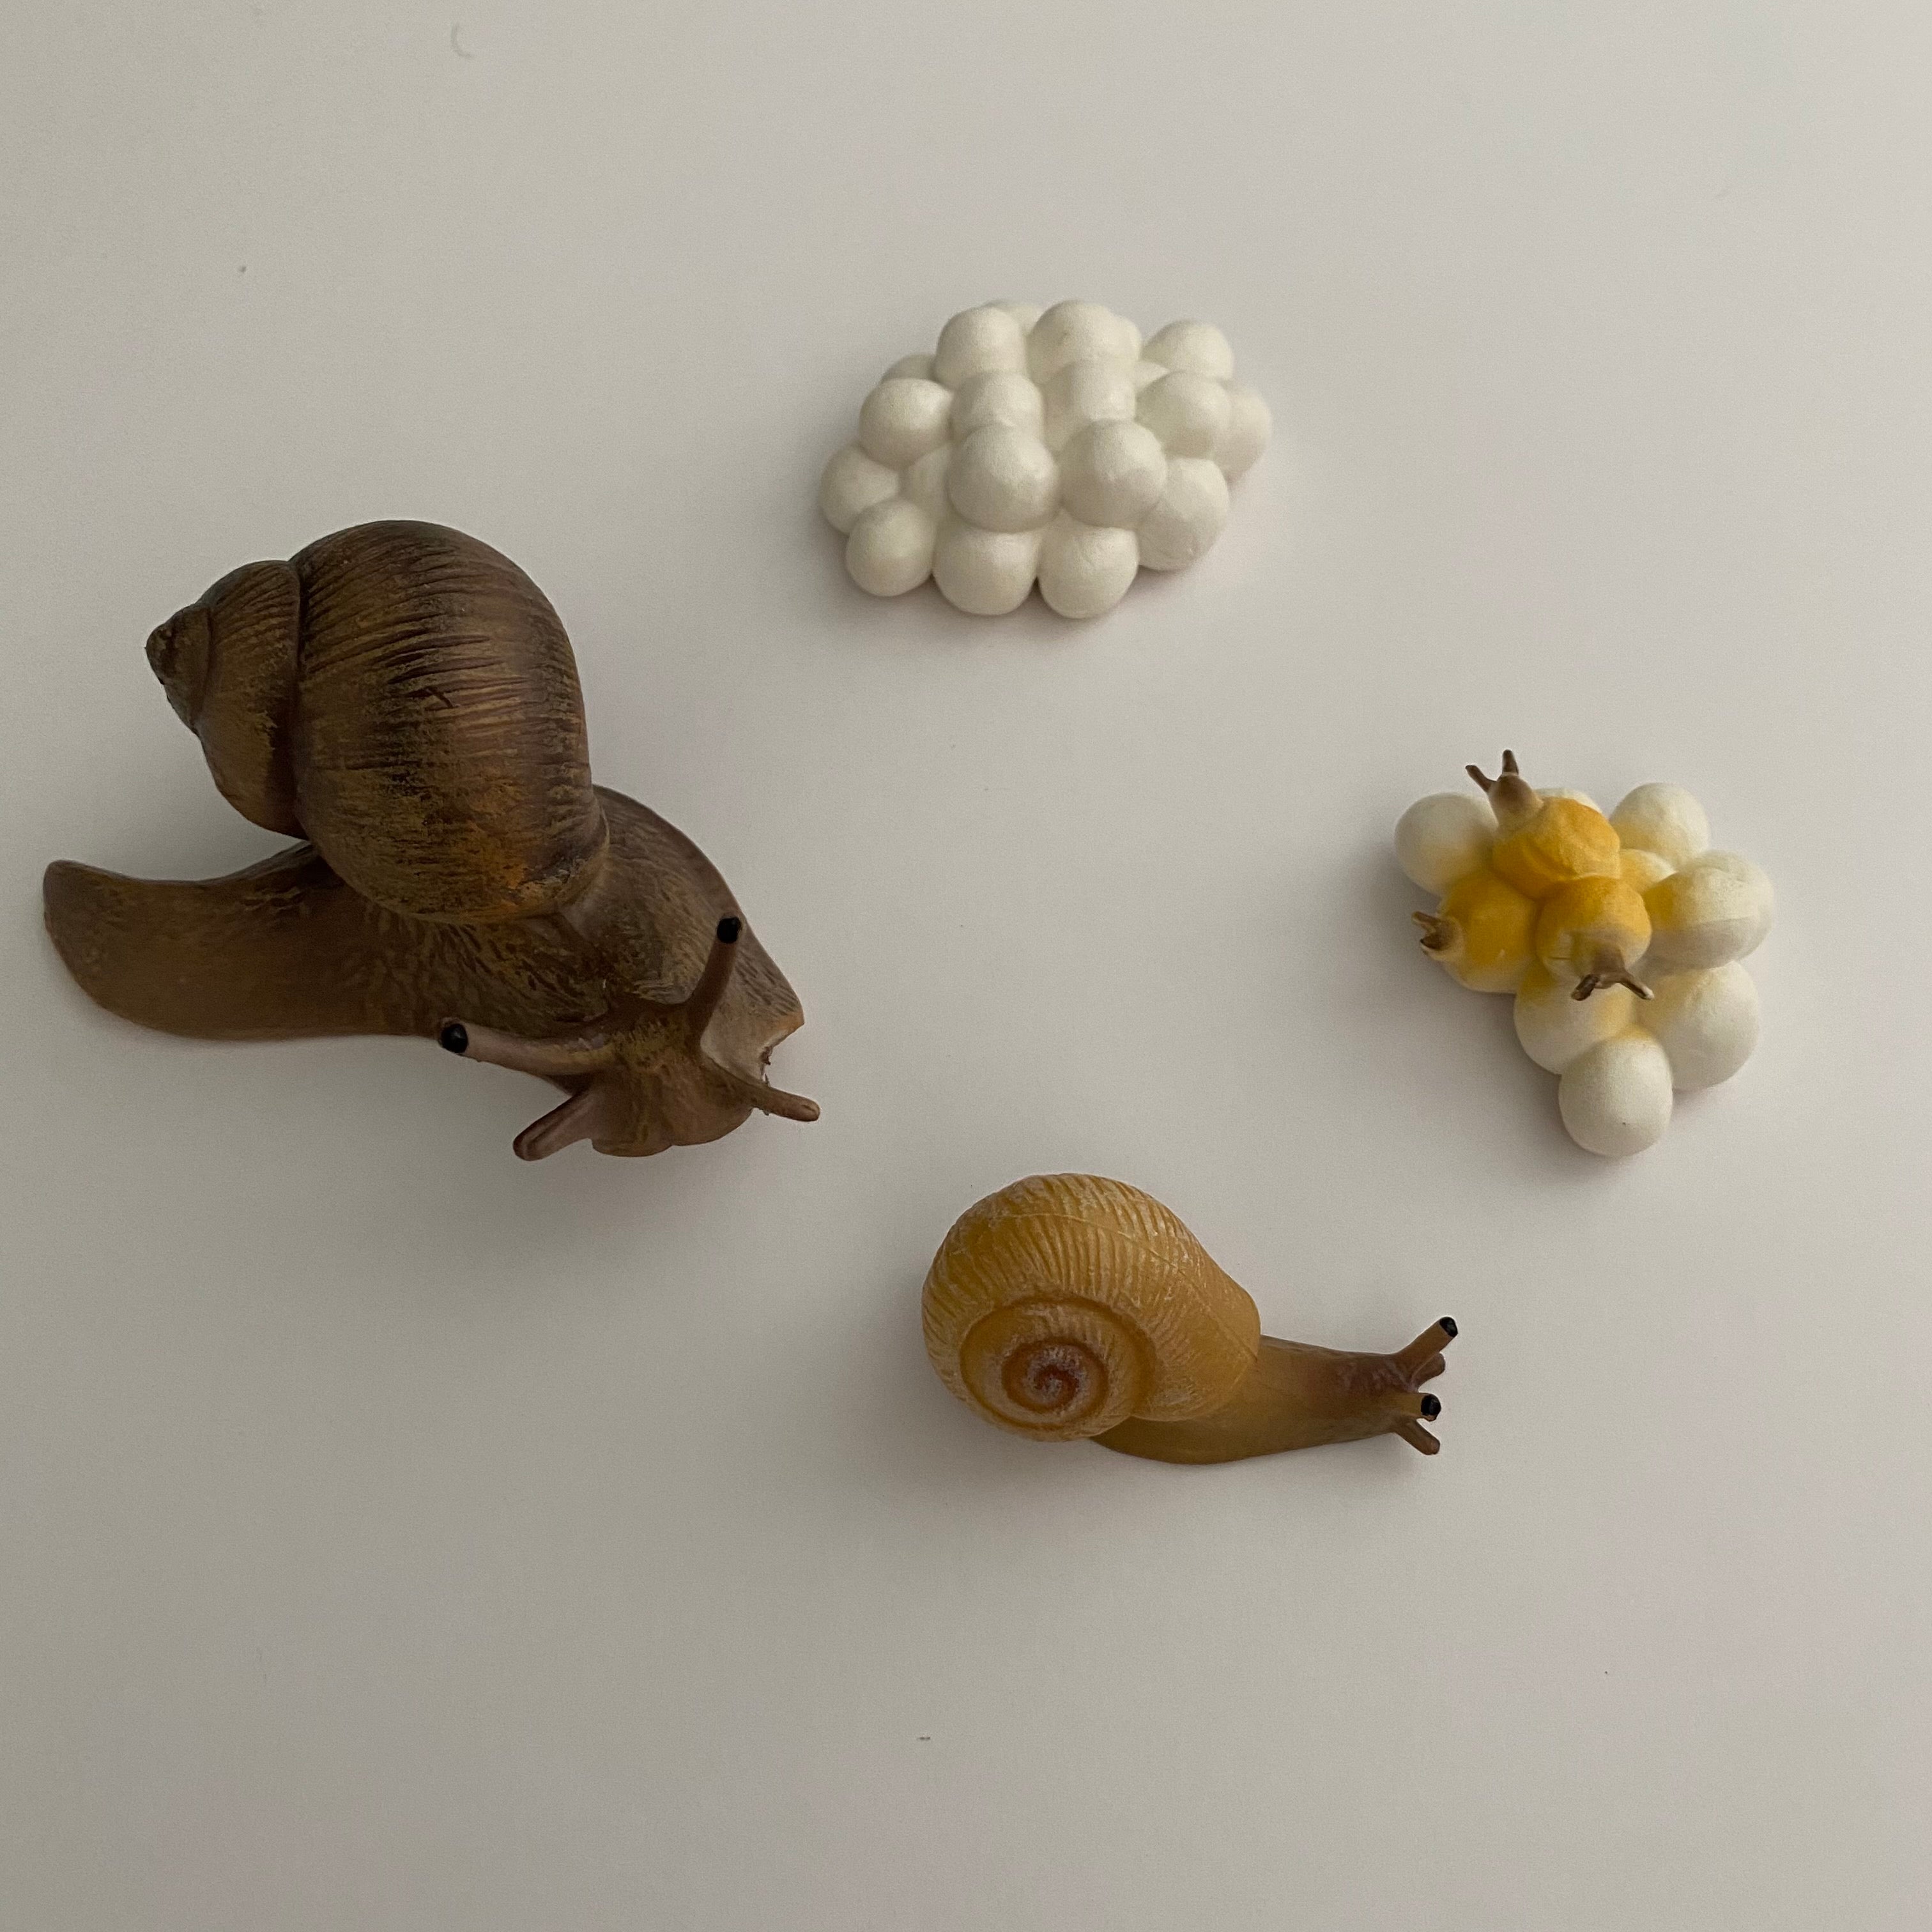
The package set contains
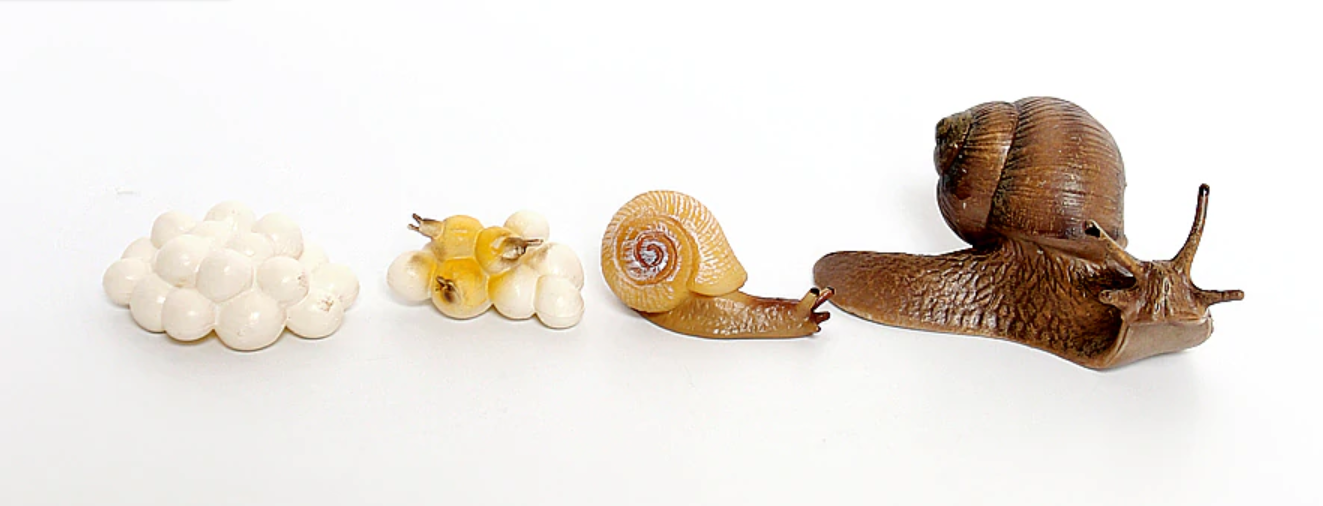
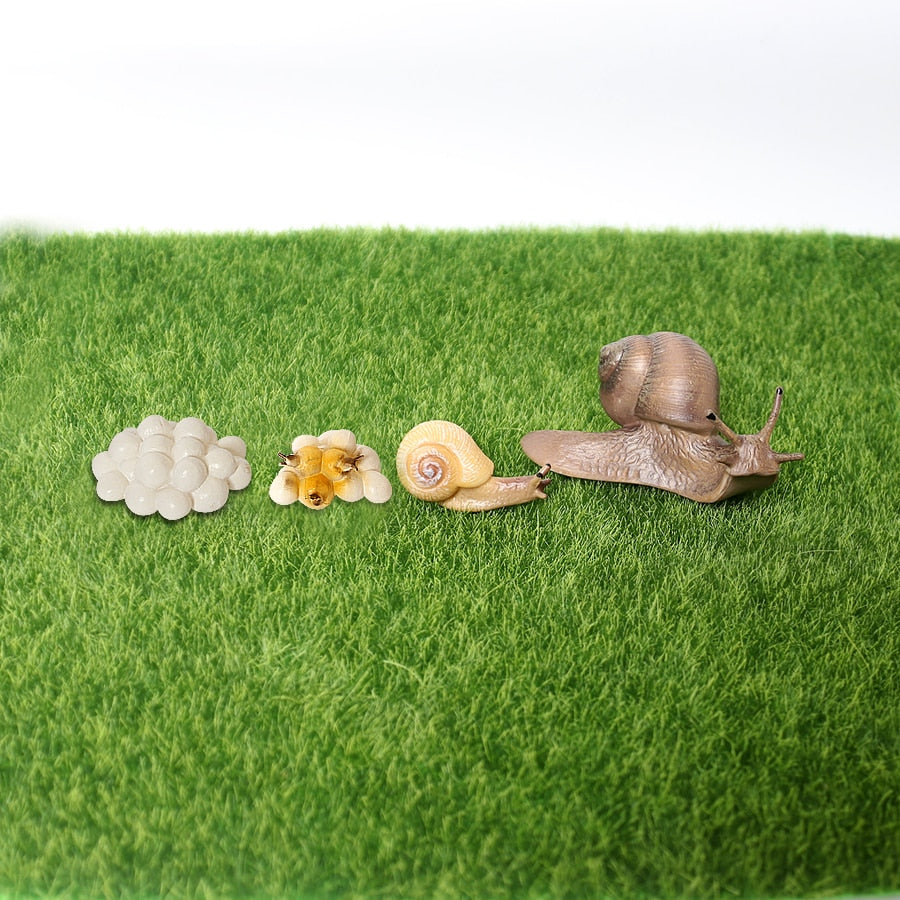
- Miniature models of Snail's Life cycle (PACKED IN A ZIPLOCK BAG )
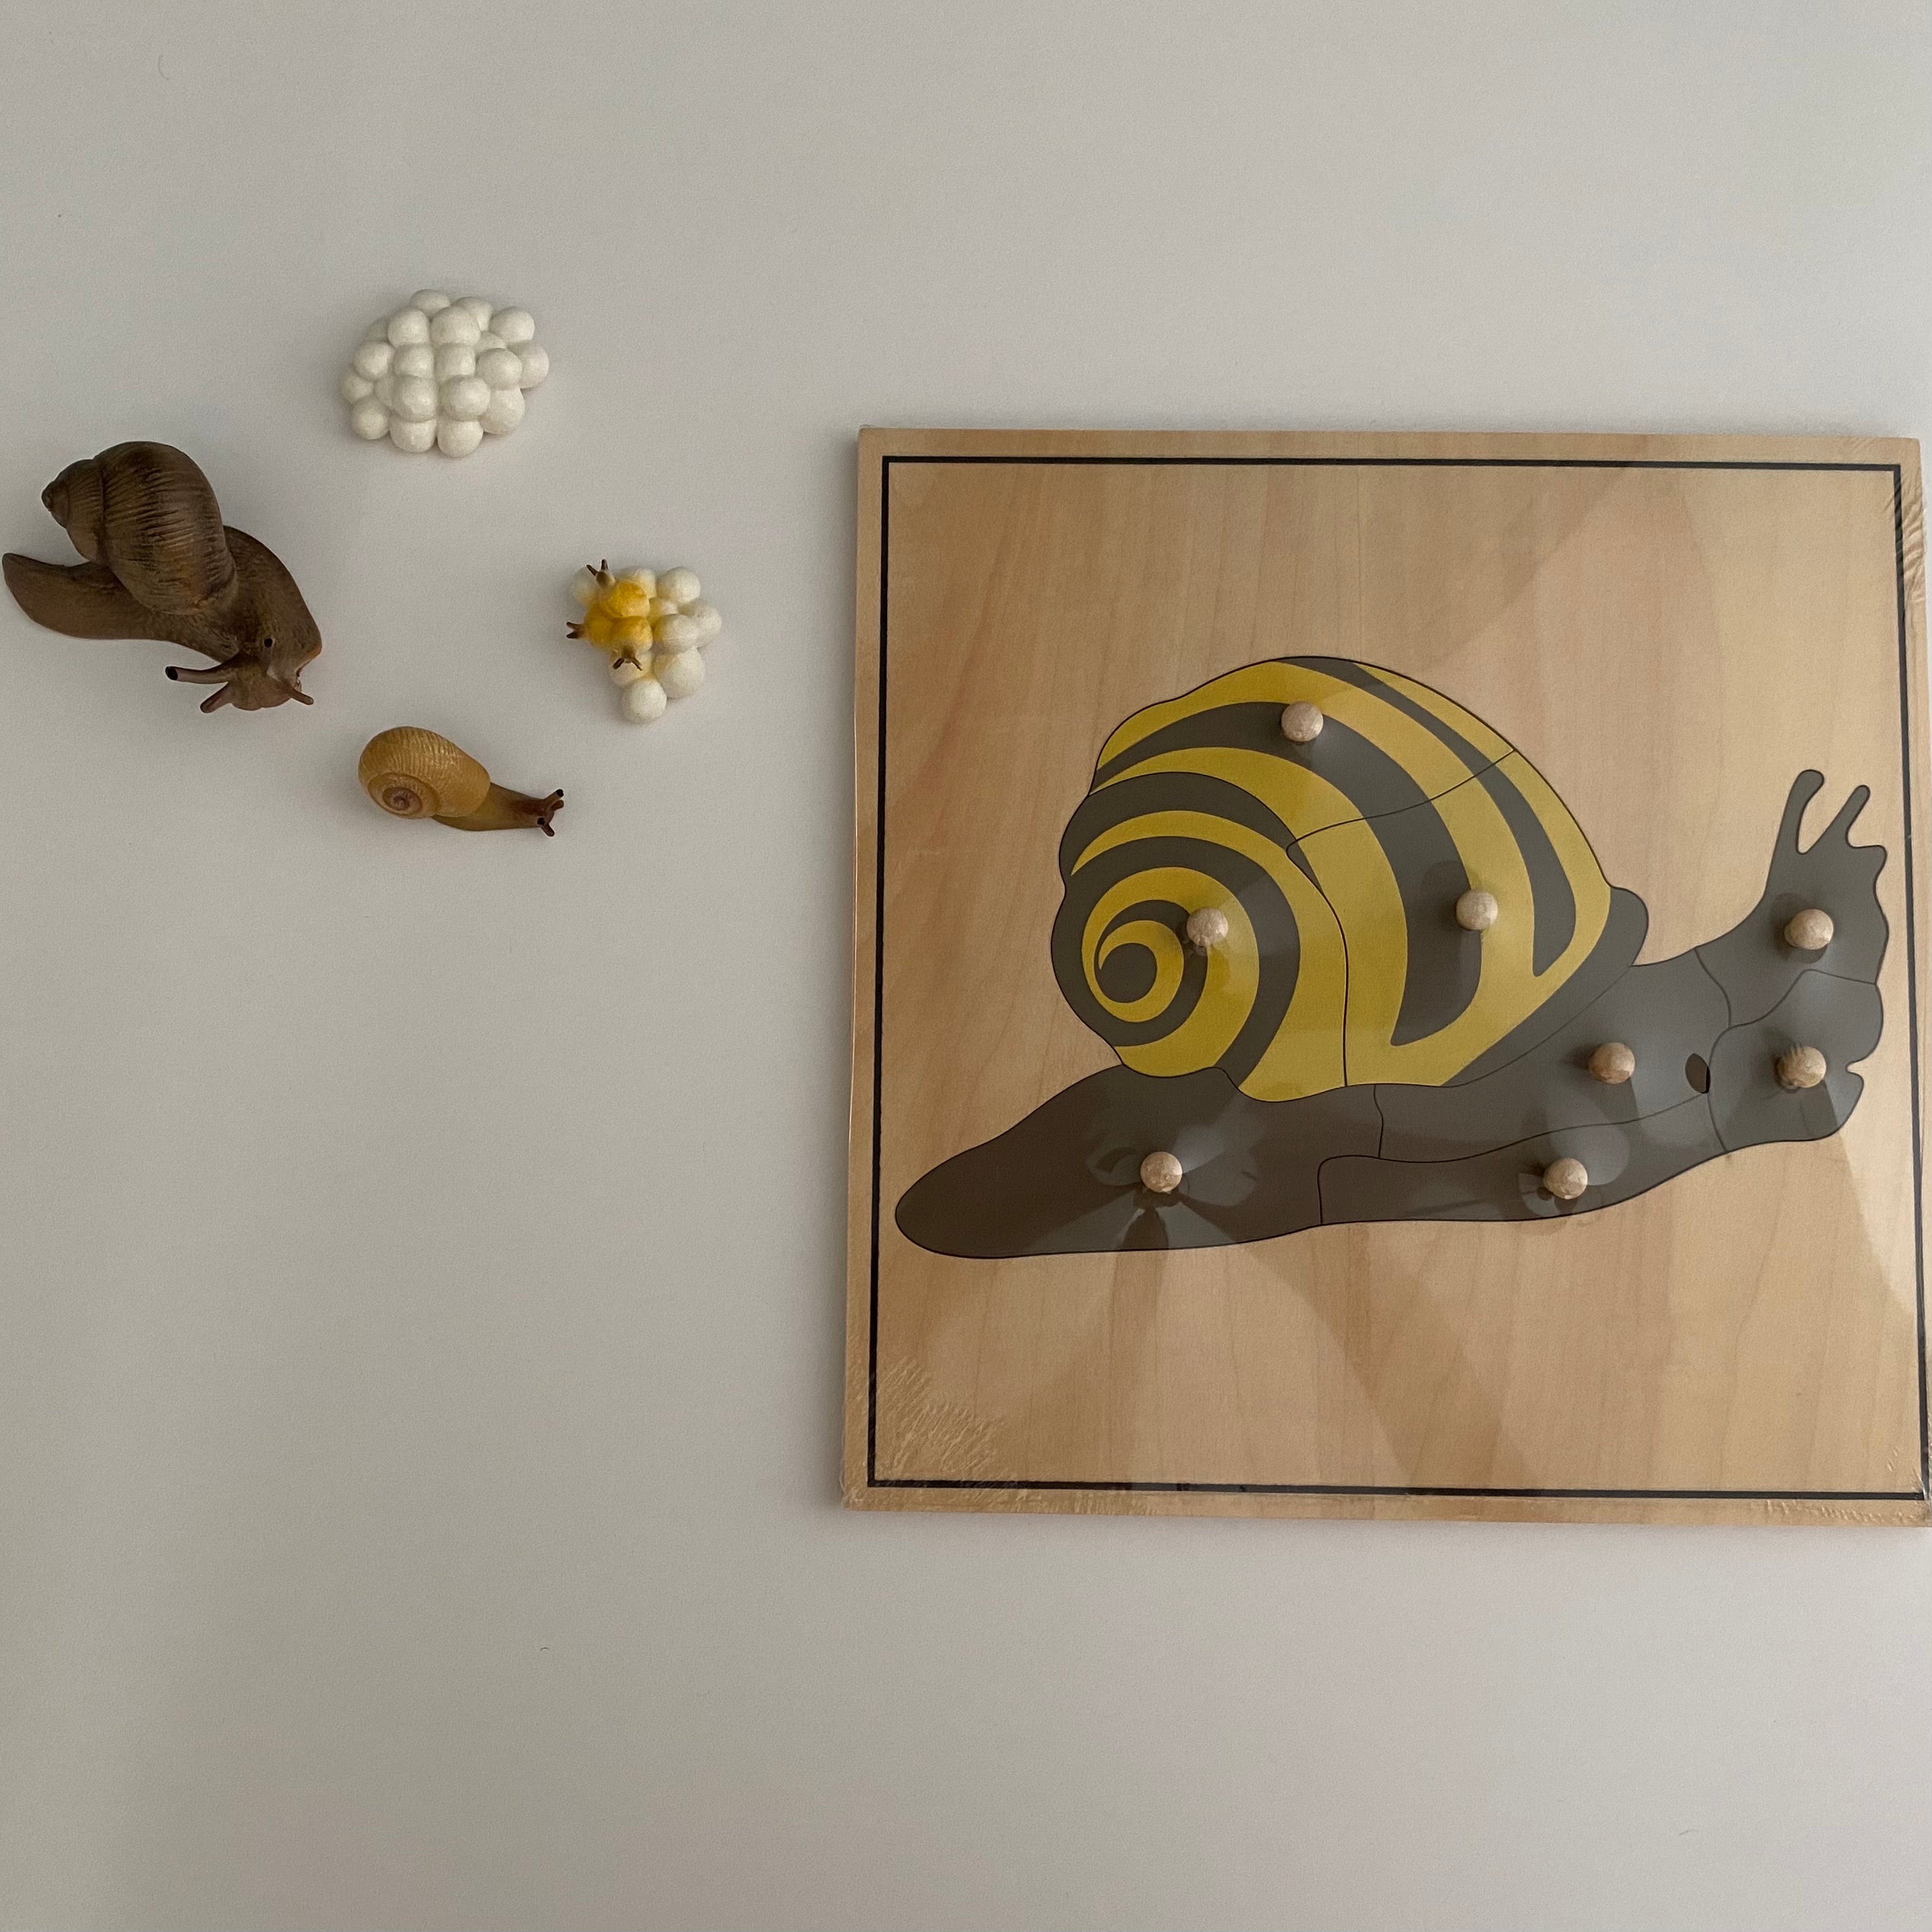
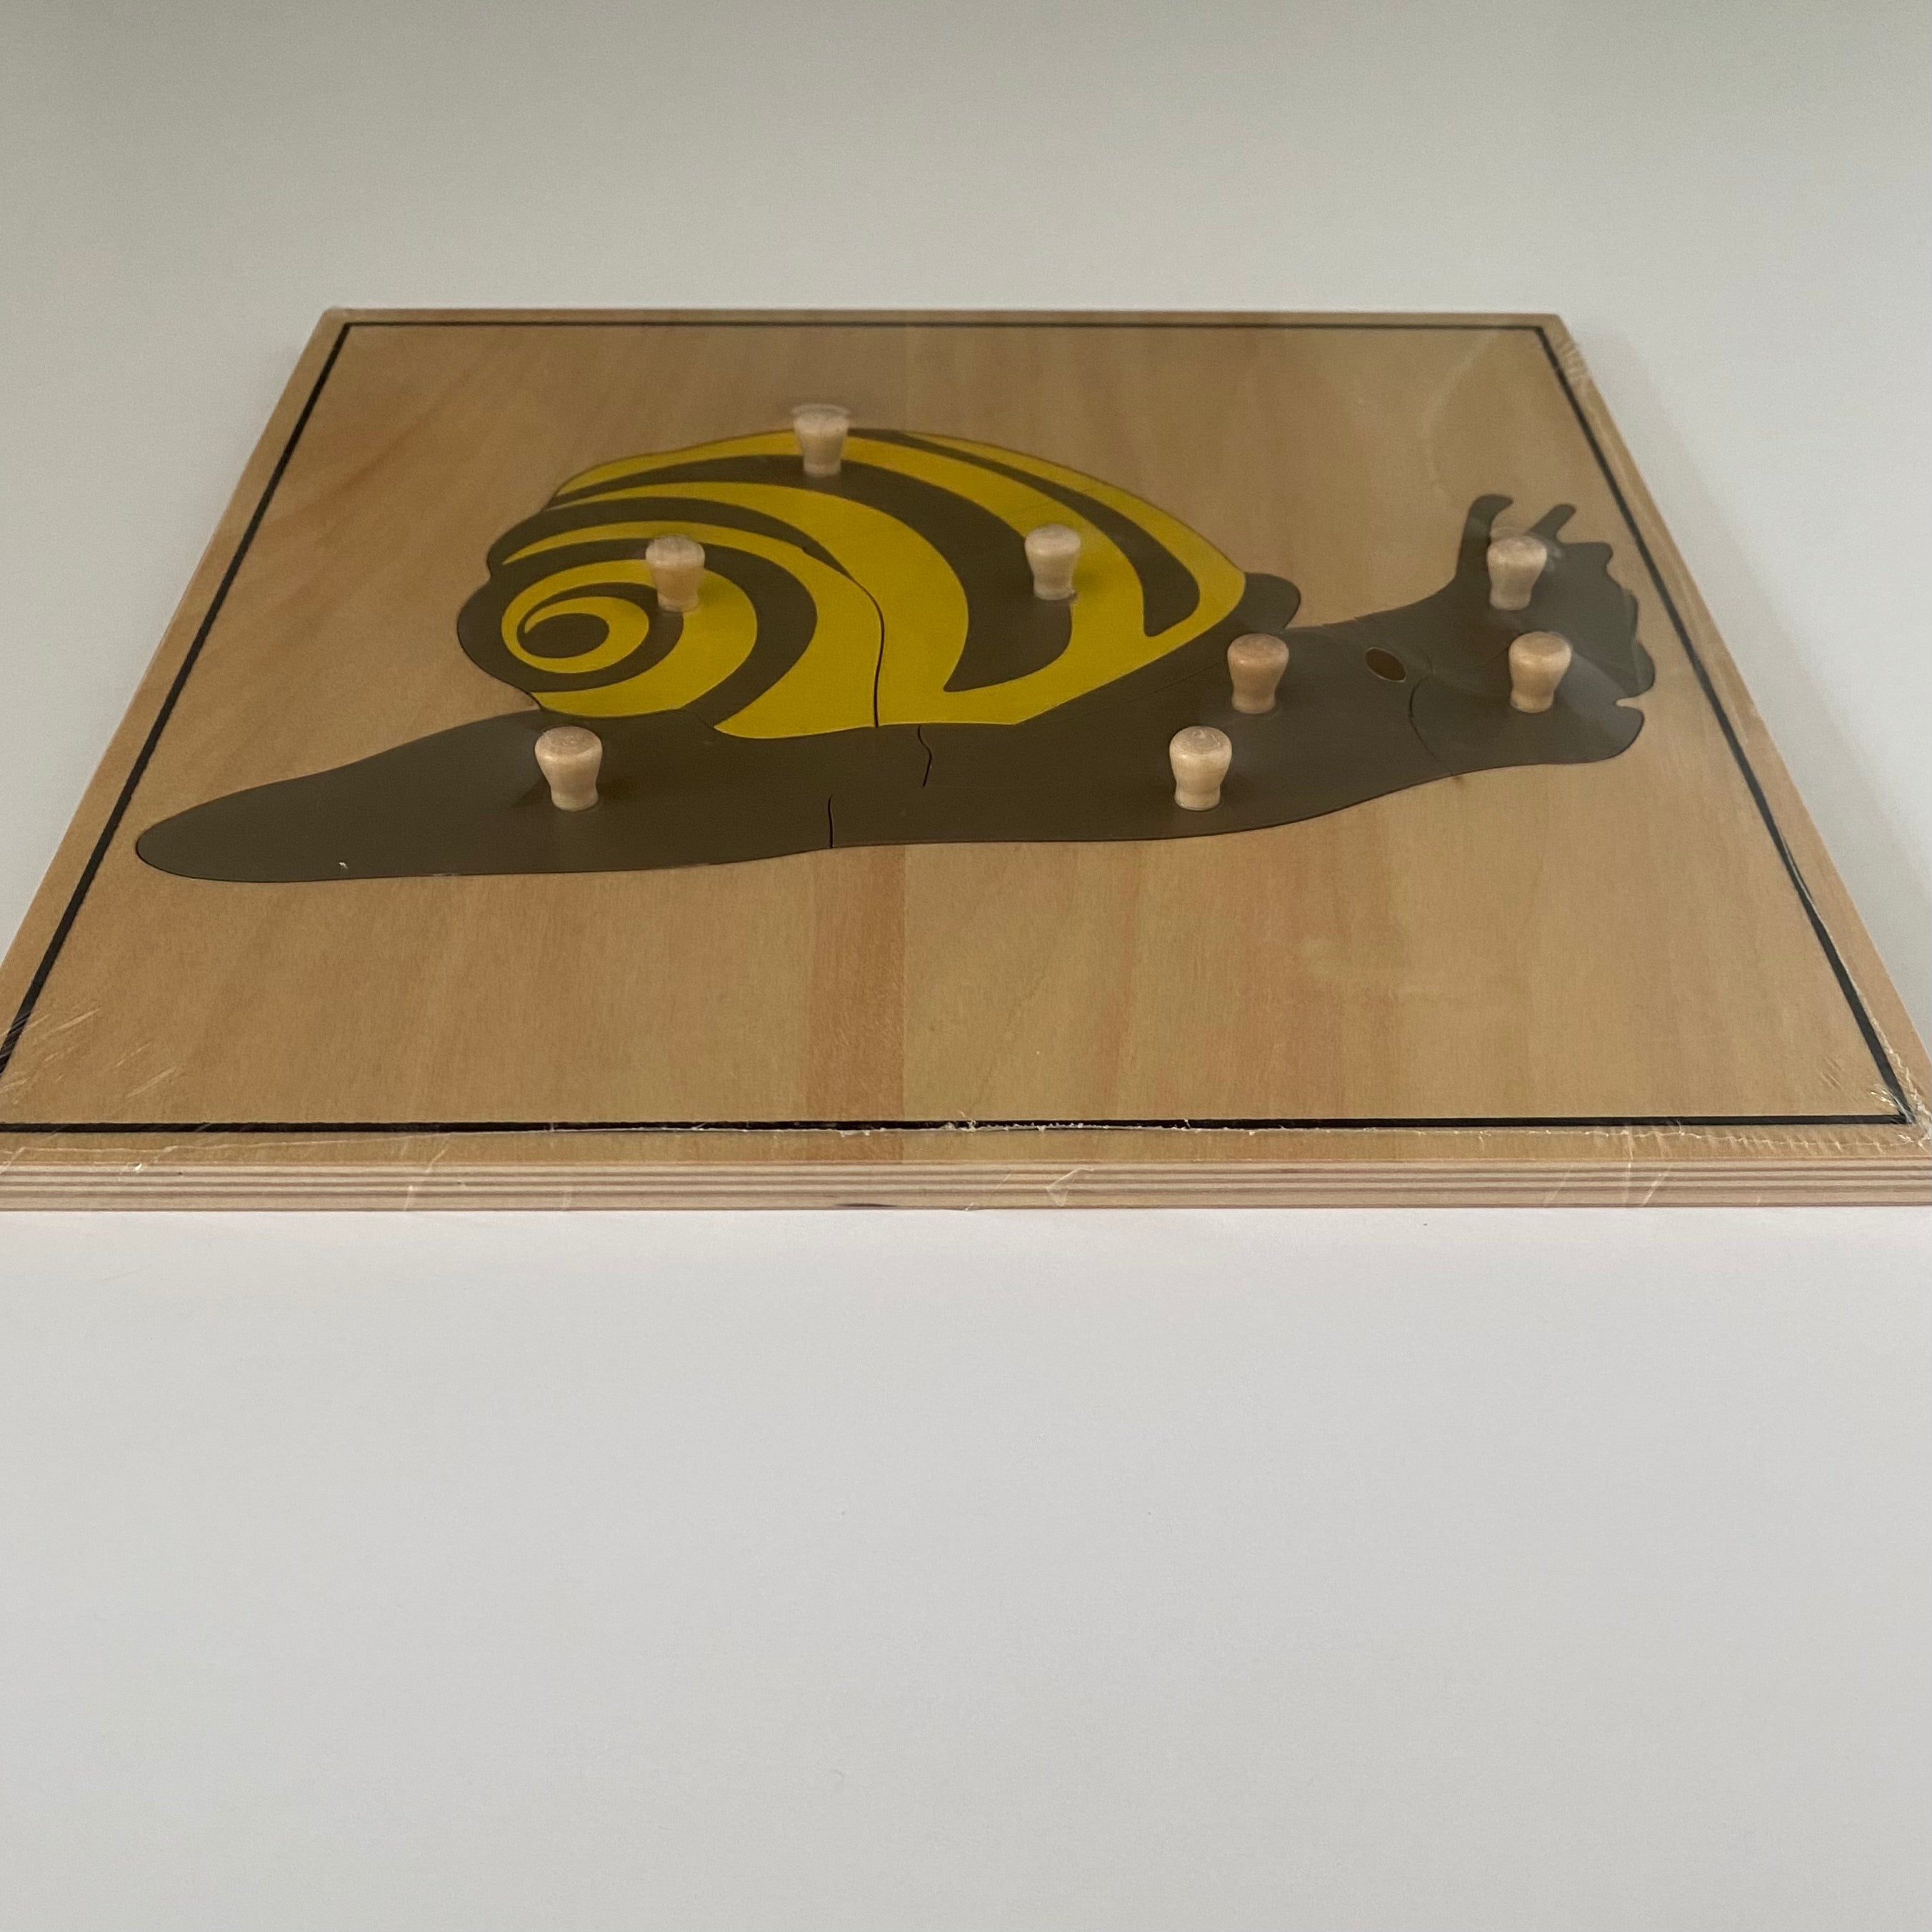
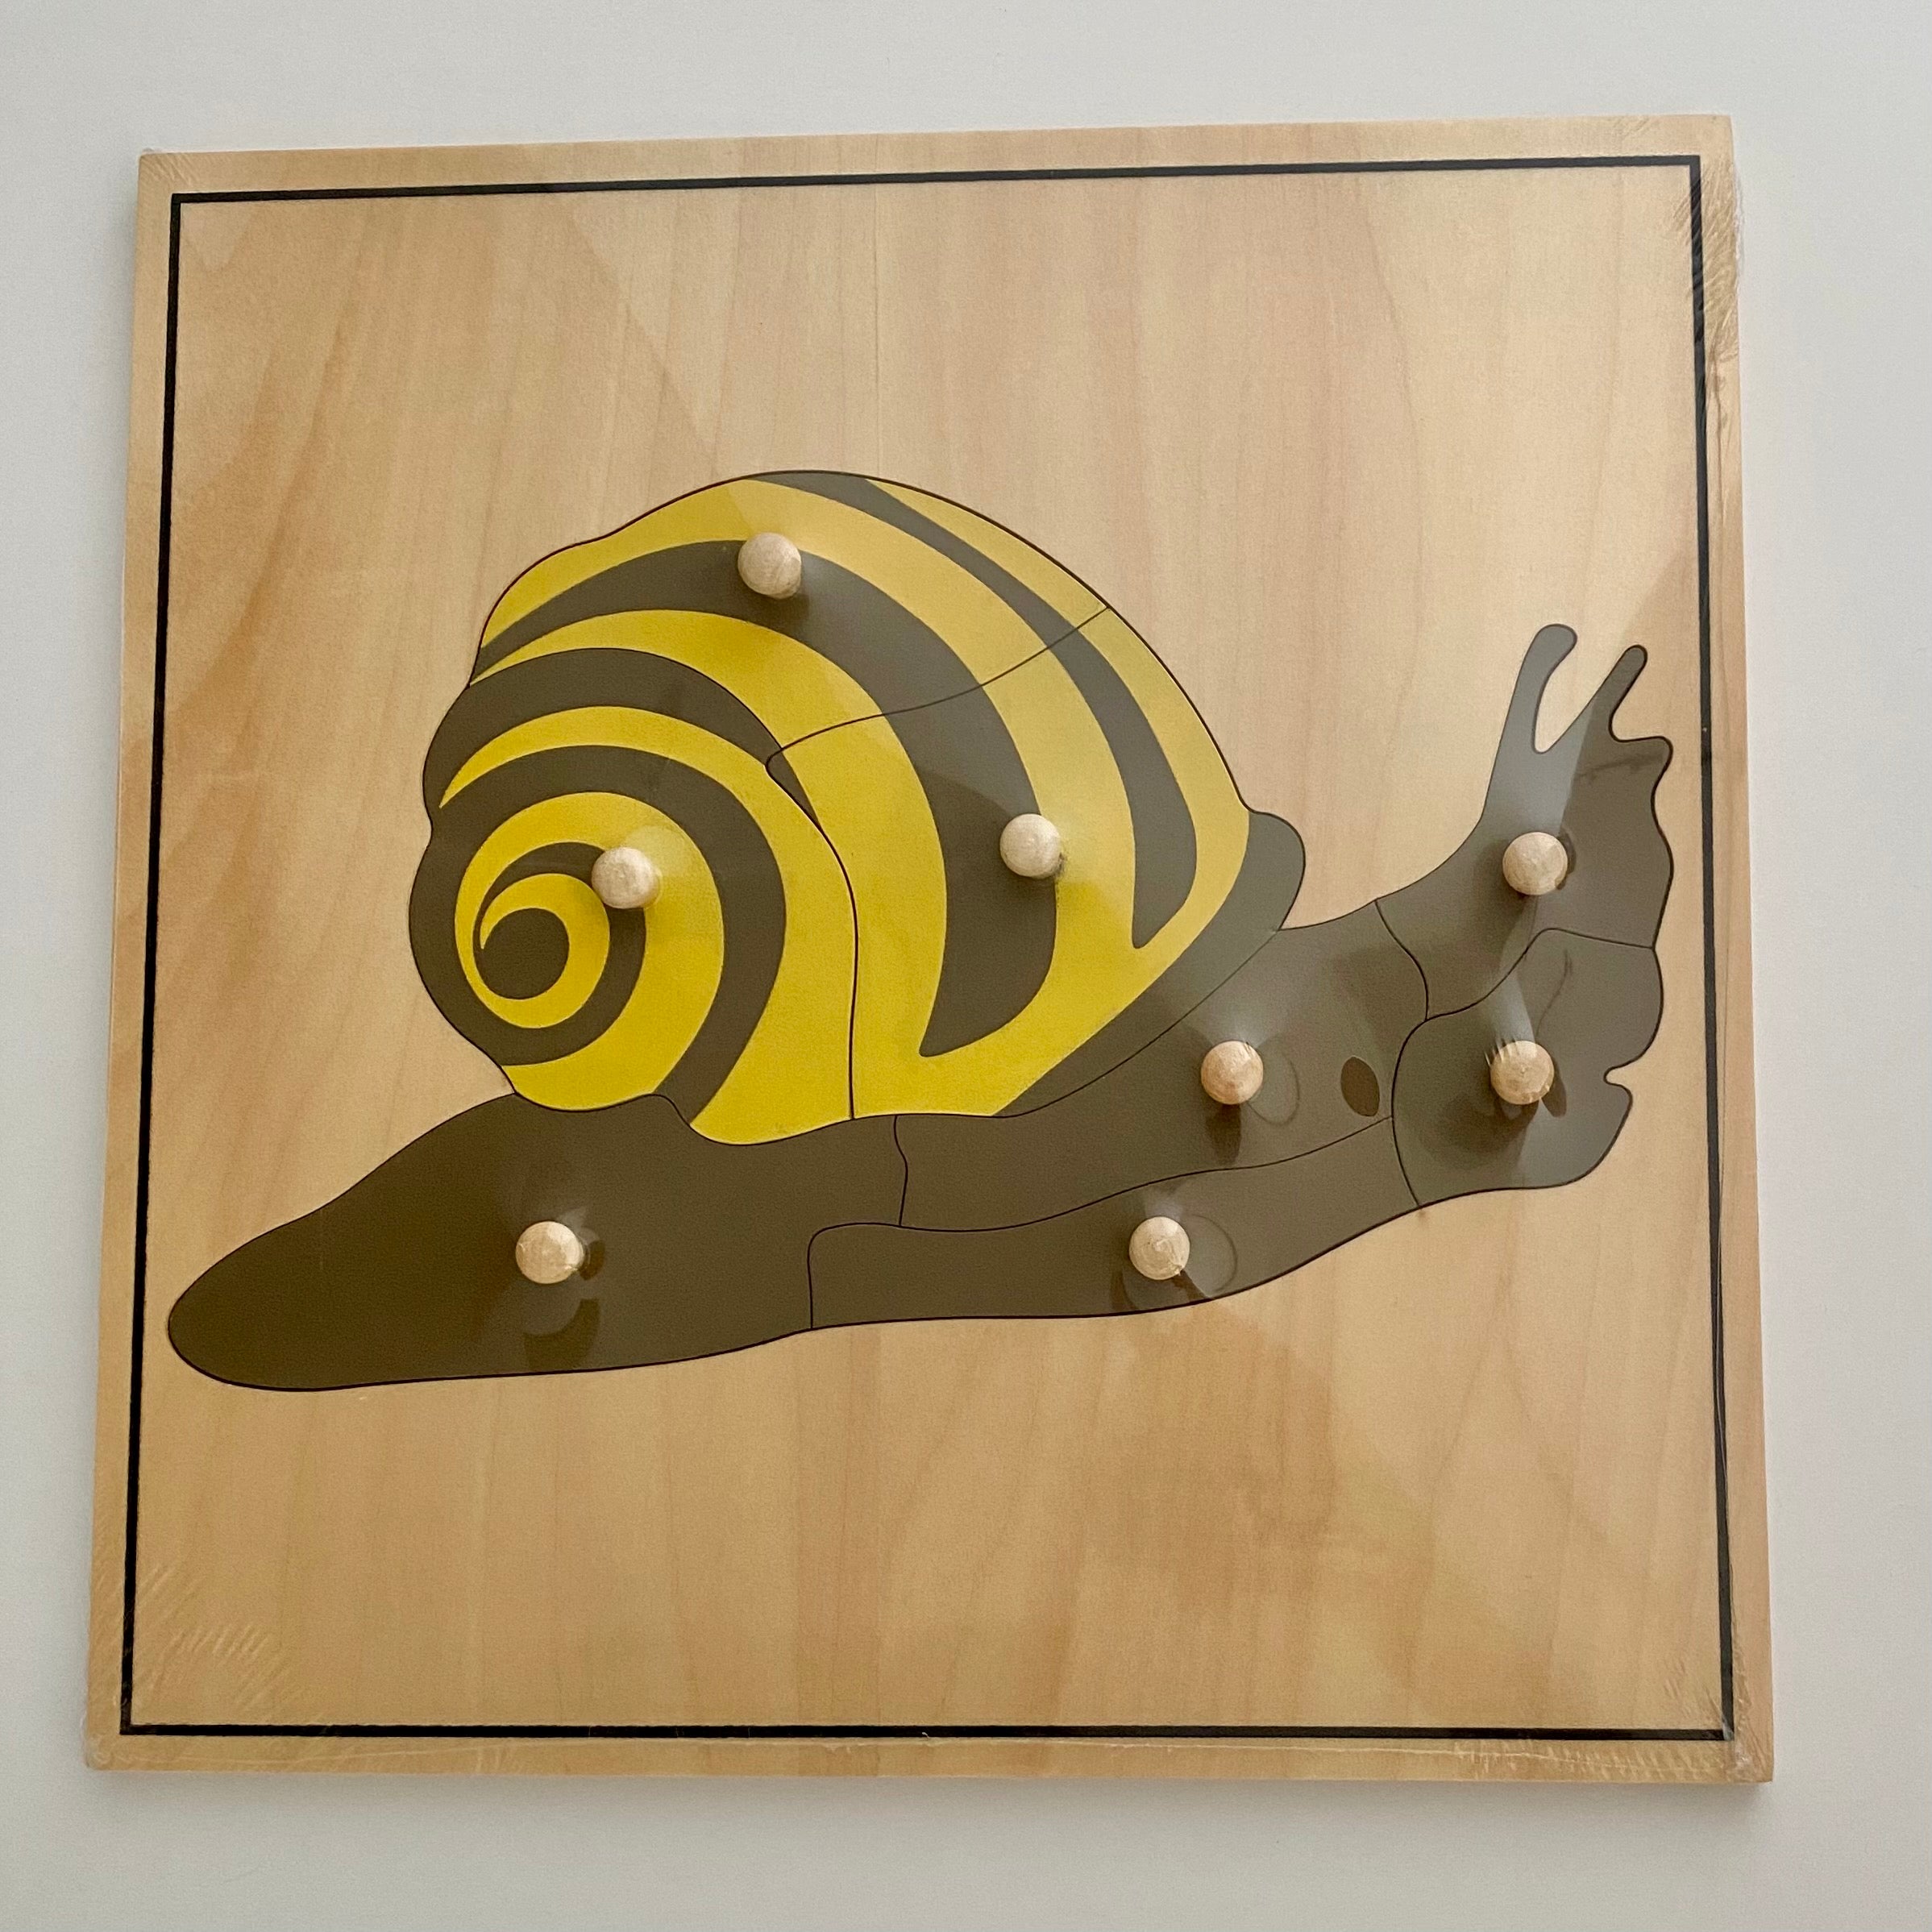
- Wooden Knob Anatomy Puzzle showing parts of a SNAIL
- Package of items 1. and 2.
The materials are suitable for a non-reading child.
Item 1.: Description
- Interesting and interactive material to ignite curiosity to learn about the lifecycle.
- Introduces the stages of the snail lifecycle in a visual manner.
- Fun way to learn science and discover the wonders of nature.
- Child will be able to order the lifecycle stages starting from egg to snail and understand how a snail is born.
How to use: Presentation 1: Lifecycle models
Note: Child does not need to be a reader for this activity.
- Remove the lifecycle models and arrange randomly on mat or table.
- Allow child to explore and share prior knowledge.
- Take the eggs and ask child to observe.
- Inform child; the mother snail will lay her eggs.
- Now take the next model and share. Repeat for the other 2 stages. Arrange the lifecycle models in a circular form as shown in the picture.
For Item 2. Description
- Stimulates child’s interest in the natural world and help them identify the animals represented.
- Provides hands-on opportunity to learn the anatomical parts of each animal.
- Each puzzle piece has a wooden knob, which encourages both tactile and visual sensory skills and enhances fine motor skills.
- Child will use their finger in pincer grip to grab the knob, which indirectly prepares the child to holding a pencil for writing in the future.
- This is a self-correcting material, which encourages problem-solving skills, as child has to figure out independently on how to fix the pieces of the puzzle.
- It enhances the child’s eye hand co-ordination and gives the child a challenge to overcome.
How to use: Presentation of Puzzle
- Begin with the puzzle.
- Remove each piece from the knob emphasizing on the pencil grip.
- Introduce the name of each piece by pointing at it. Ask child to show the parts as you name them. Point at the part and ask child, “What is this?” (Note: This is called the 3 Period Lesson in Montessori demonstrations.)
- Build the puzzle outside of the wooden tray.
- Build the puzzle back into the tray.

© 2024 RightToLearn.com.sg. POS and Ecommerce by Shopify
X